Overview
This article covers the steps of sending an invoice to your customer. This step is ideally completed at the end of the job and should be done after reviewing all job and invoice details
Sending an Invoice
Steps to Send Invoice
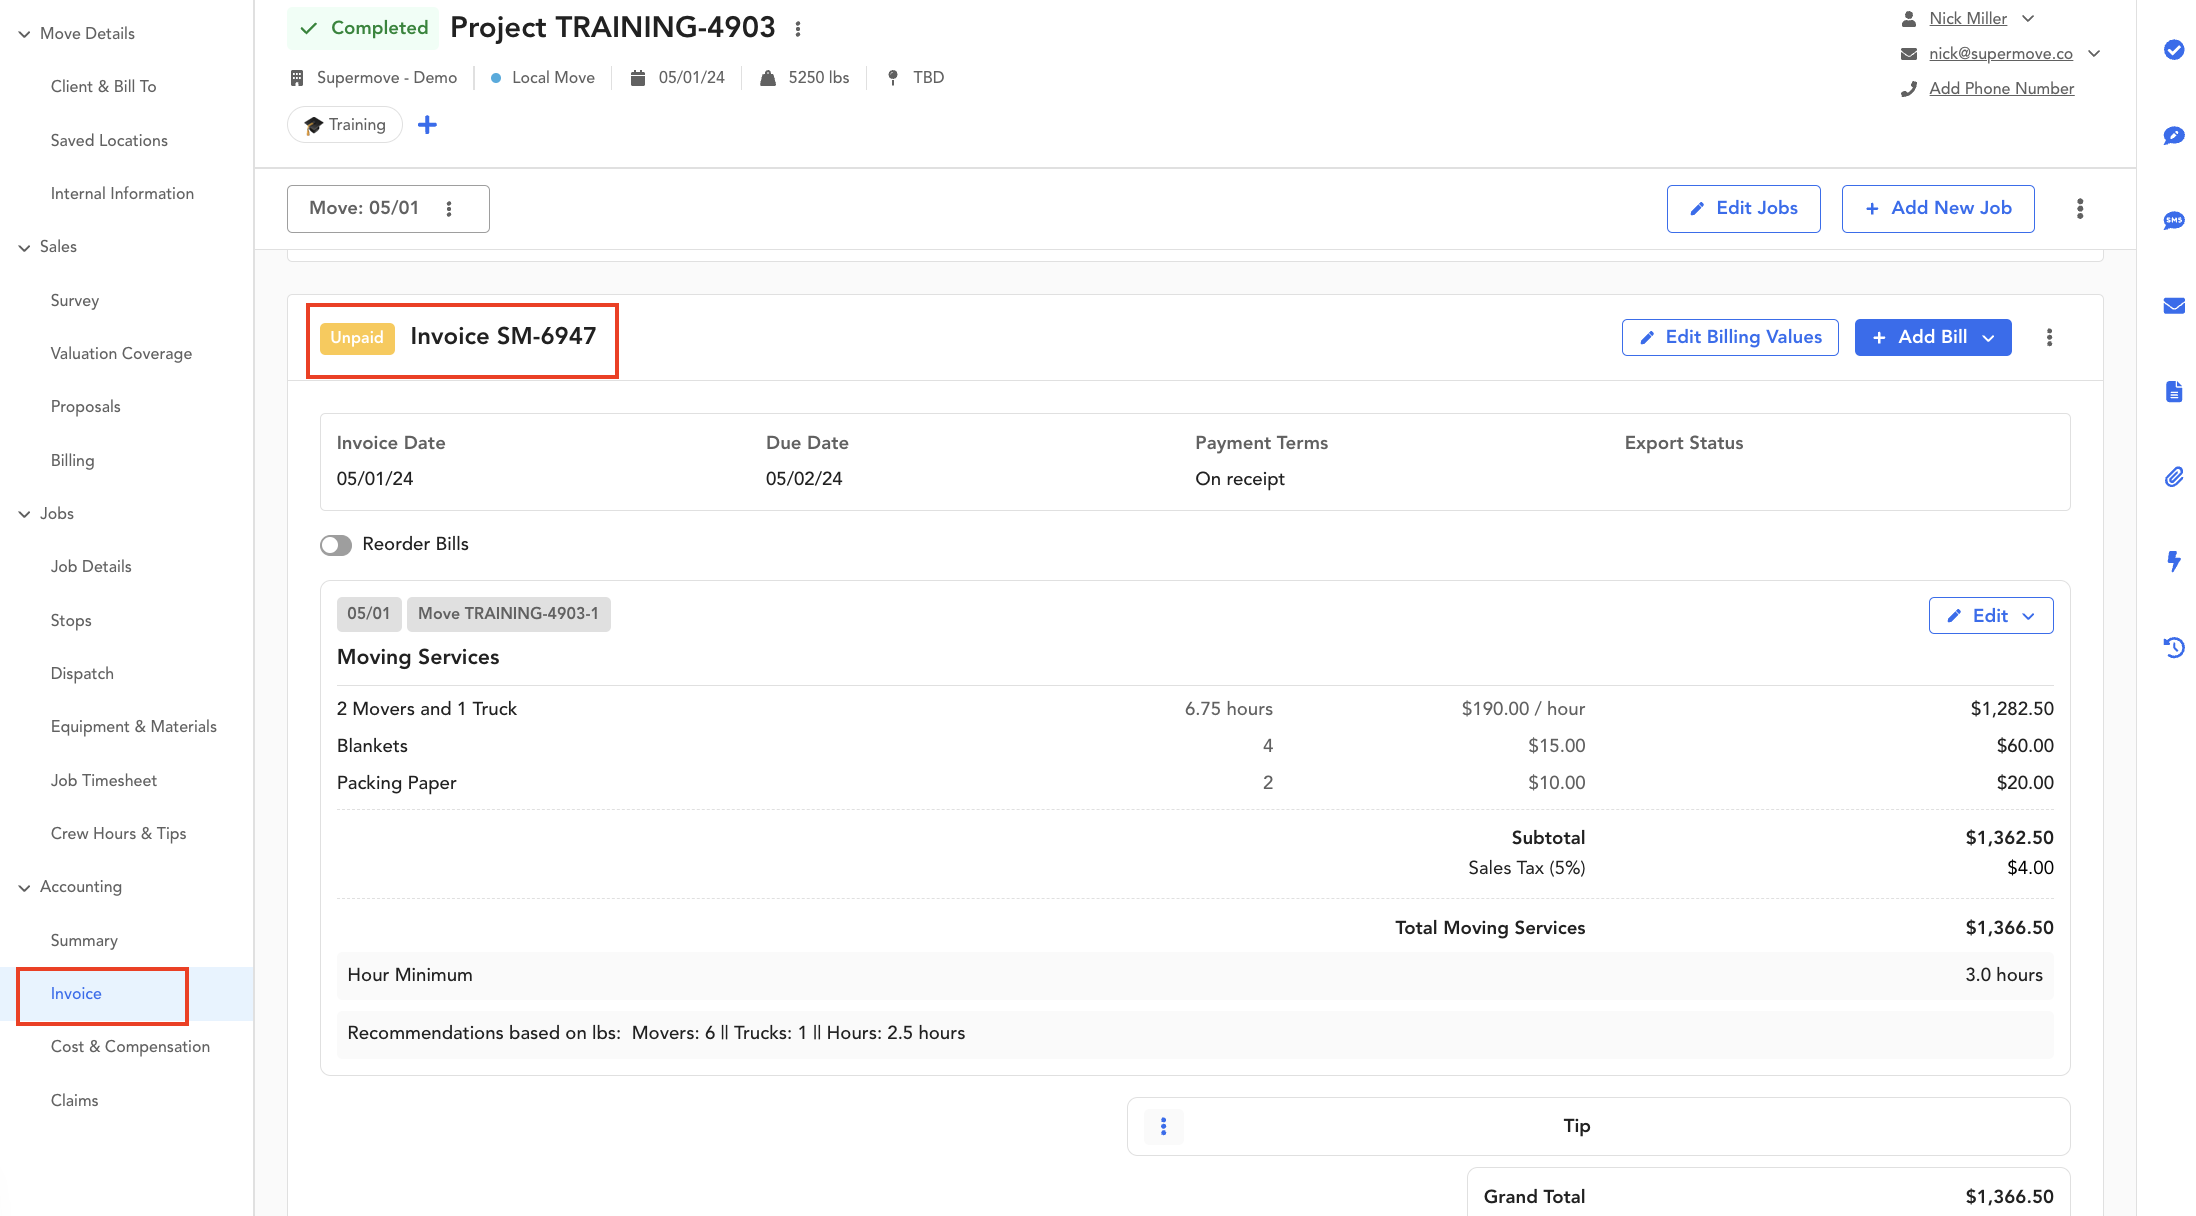
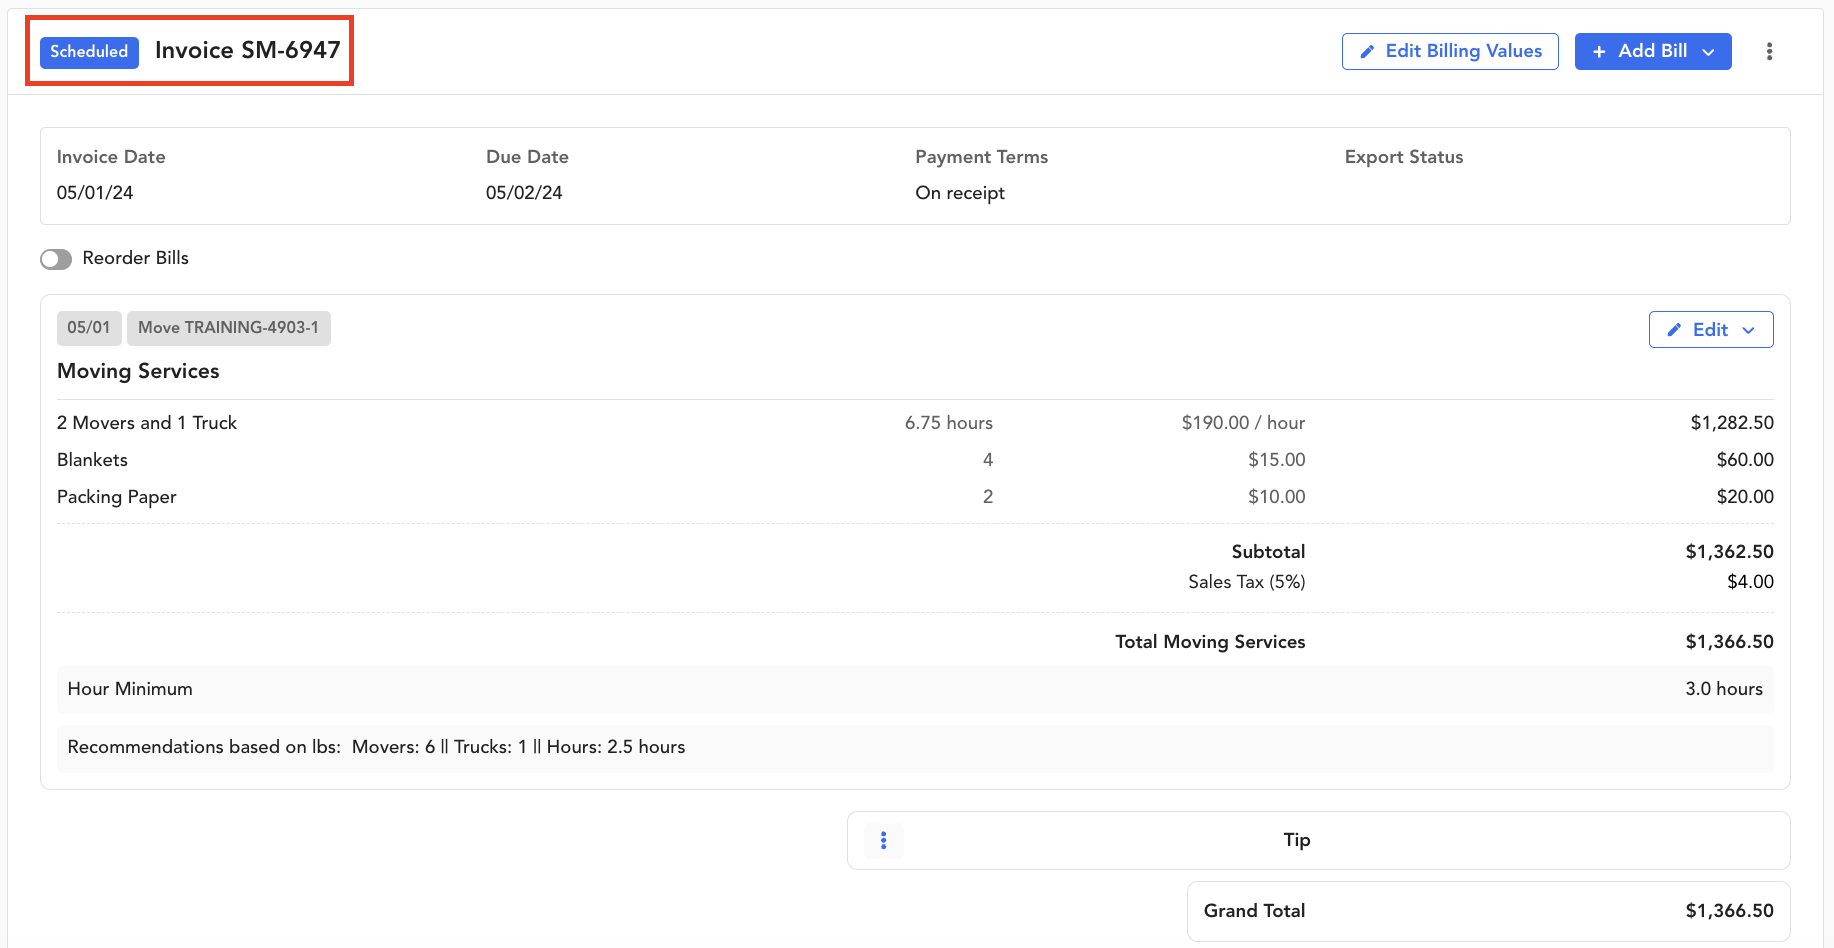
1. Navigate to the Invoice section on the Move Project page
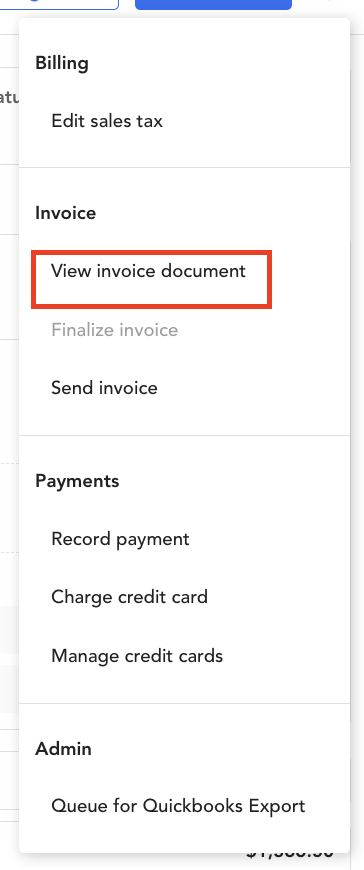
2. Click on 3 Dots on the right of the Invoice Menu
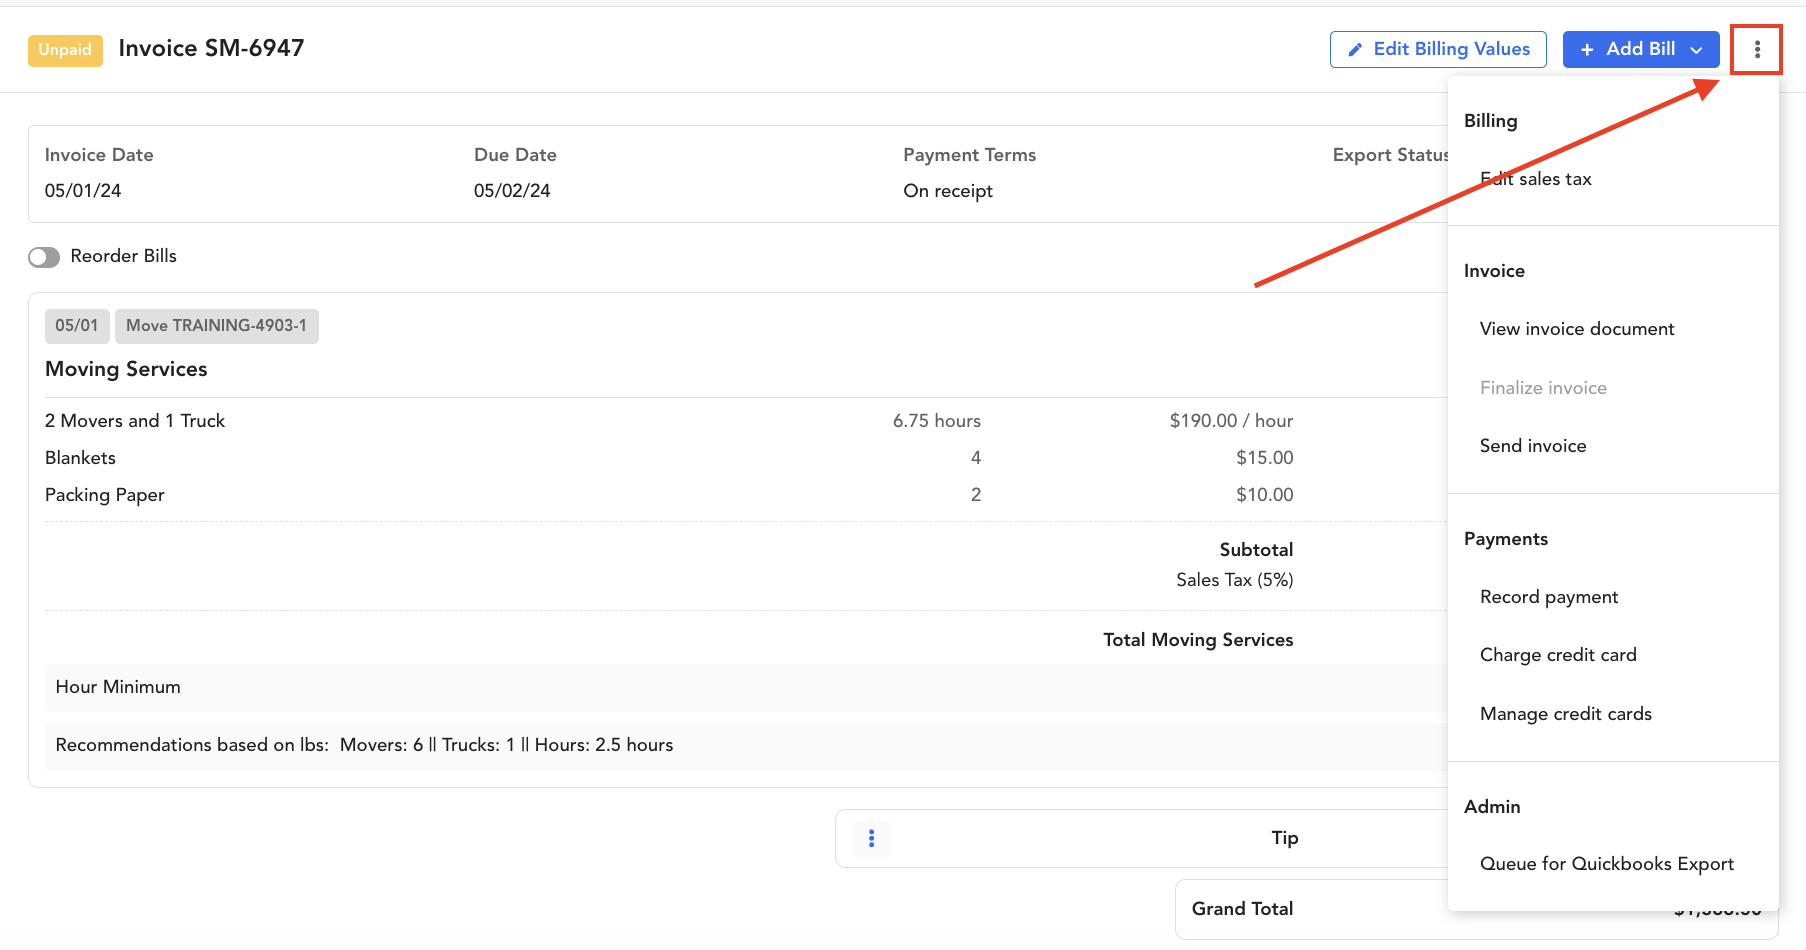
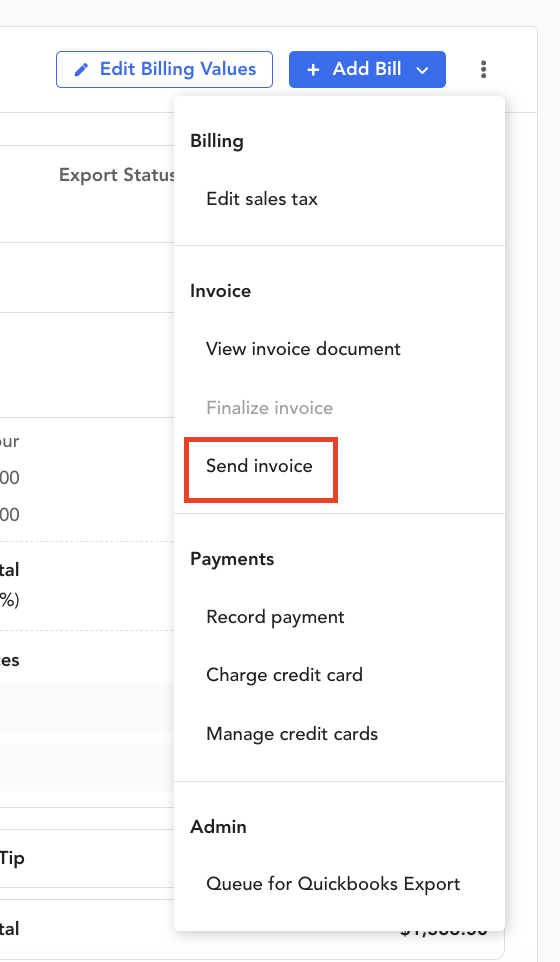
3. Click Send Invoice
Note: You can access this setting when all jobs in the project have been completed
4. Enter desired Invoice Date and Payment Terms
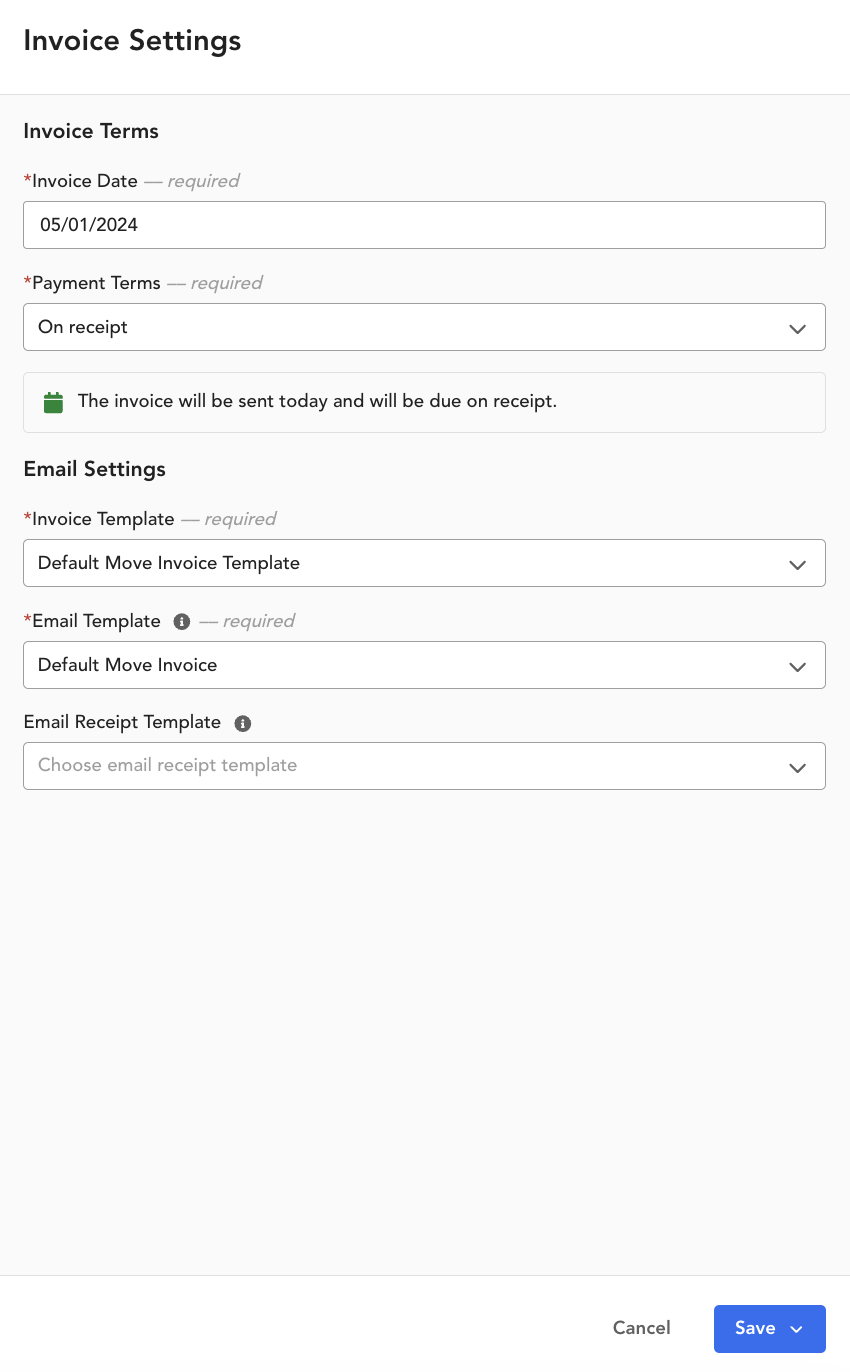
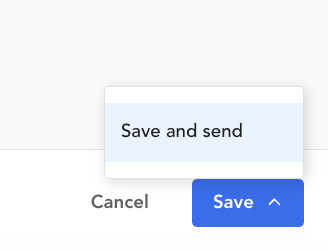
5. Now press Save and Save and Send
6. Your Invoice Status should now show Scheduled
Note: If you selected to send your invoice immediately, a quick page refresh should show Invoice Status as Unpaid (assuming the invoice had a balance greater than $0). If you selected to send your invoice in the future, Invoice Status will remain Scheduled until sent
Important: By default there is no Receipt Email Template selected meaning no receipt email will be sent out. If a receipt is selected, anytime a payment is made on the invoice (even if the invoice wasn't sent), a receipt will be sent automatically. Invoices receipts template should only be set on projects that are invoiced AFTER the project is complete. </>
Viewing an Invoice
Steps to View Invoice
1. Navigate to the Invoice section on the Move Project page
2. Click on 3 Dots on the right of the Invoice Menu
3. Click View invoice document
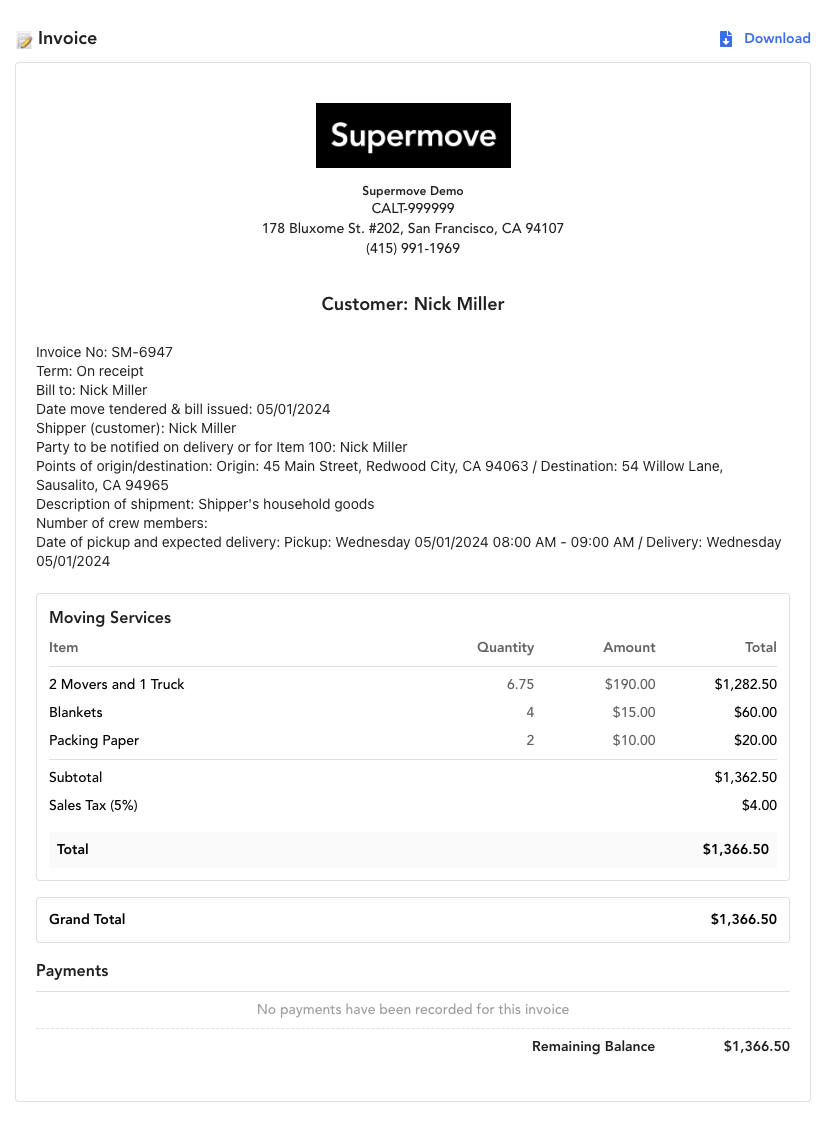
4. From here you can View or Download the Invoice Document
Note: If you have any questions, be sure to contact Supermove Product Experts at help@supermove.com
Comments
0 comments
Please sign in to leave a comment.